How to Style a Family Bookshelf
Disclaimer: Some links in this post are affiliate links. If you click through and pay for a product or service, I’ll be compensated at no cost to you. I only recommend products or services I love and/or use myself.

I love a well styled bookshelf.
I have spent much of my educational and work experience merchandising horizonal or vertical planes for photo shoots, events and interior spaces. Finding the right balance of color, size and texture is no easy feat and there’s such a feeling of accomplishment when everything finally falls into place.
I recently installed an additional bookshelf in my family room to house and organize our growing collection of books. I already have two bookshelves installed that previously contained bins of toys, books and art supplies, so I decided to mostly separate the books from the toys as this particular shelf can be seen from the front hall and I wanted a nice clean look.
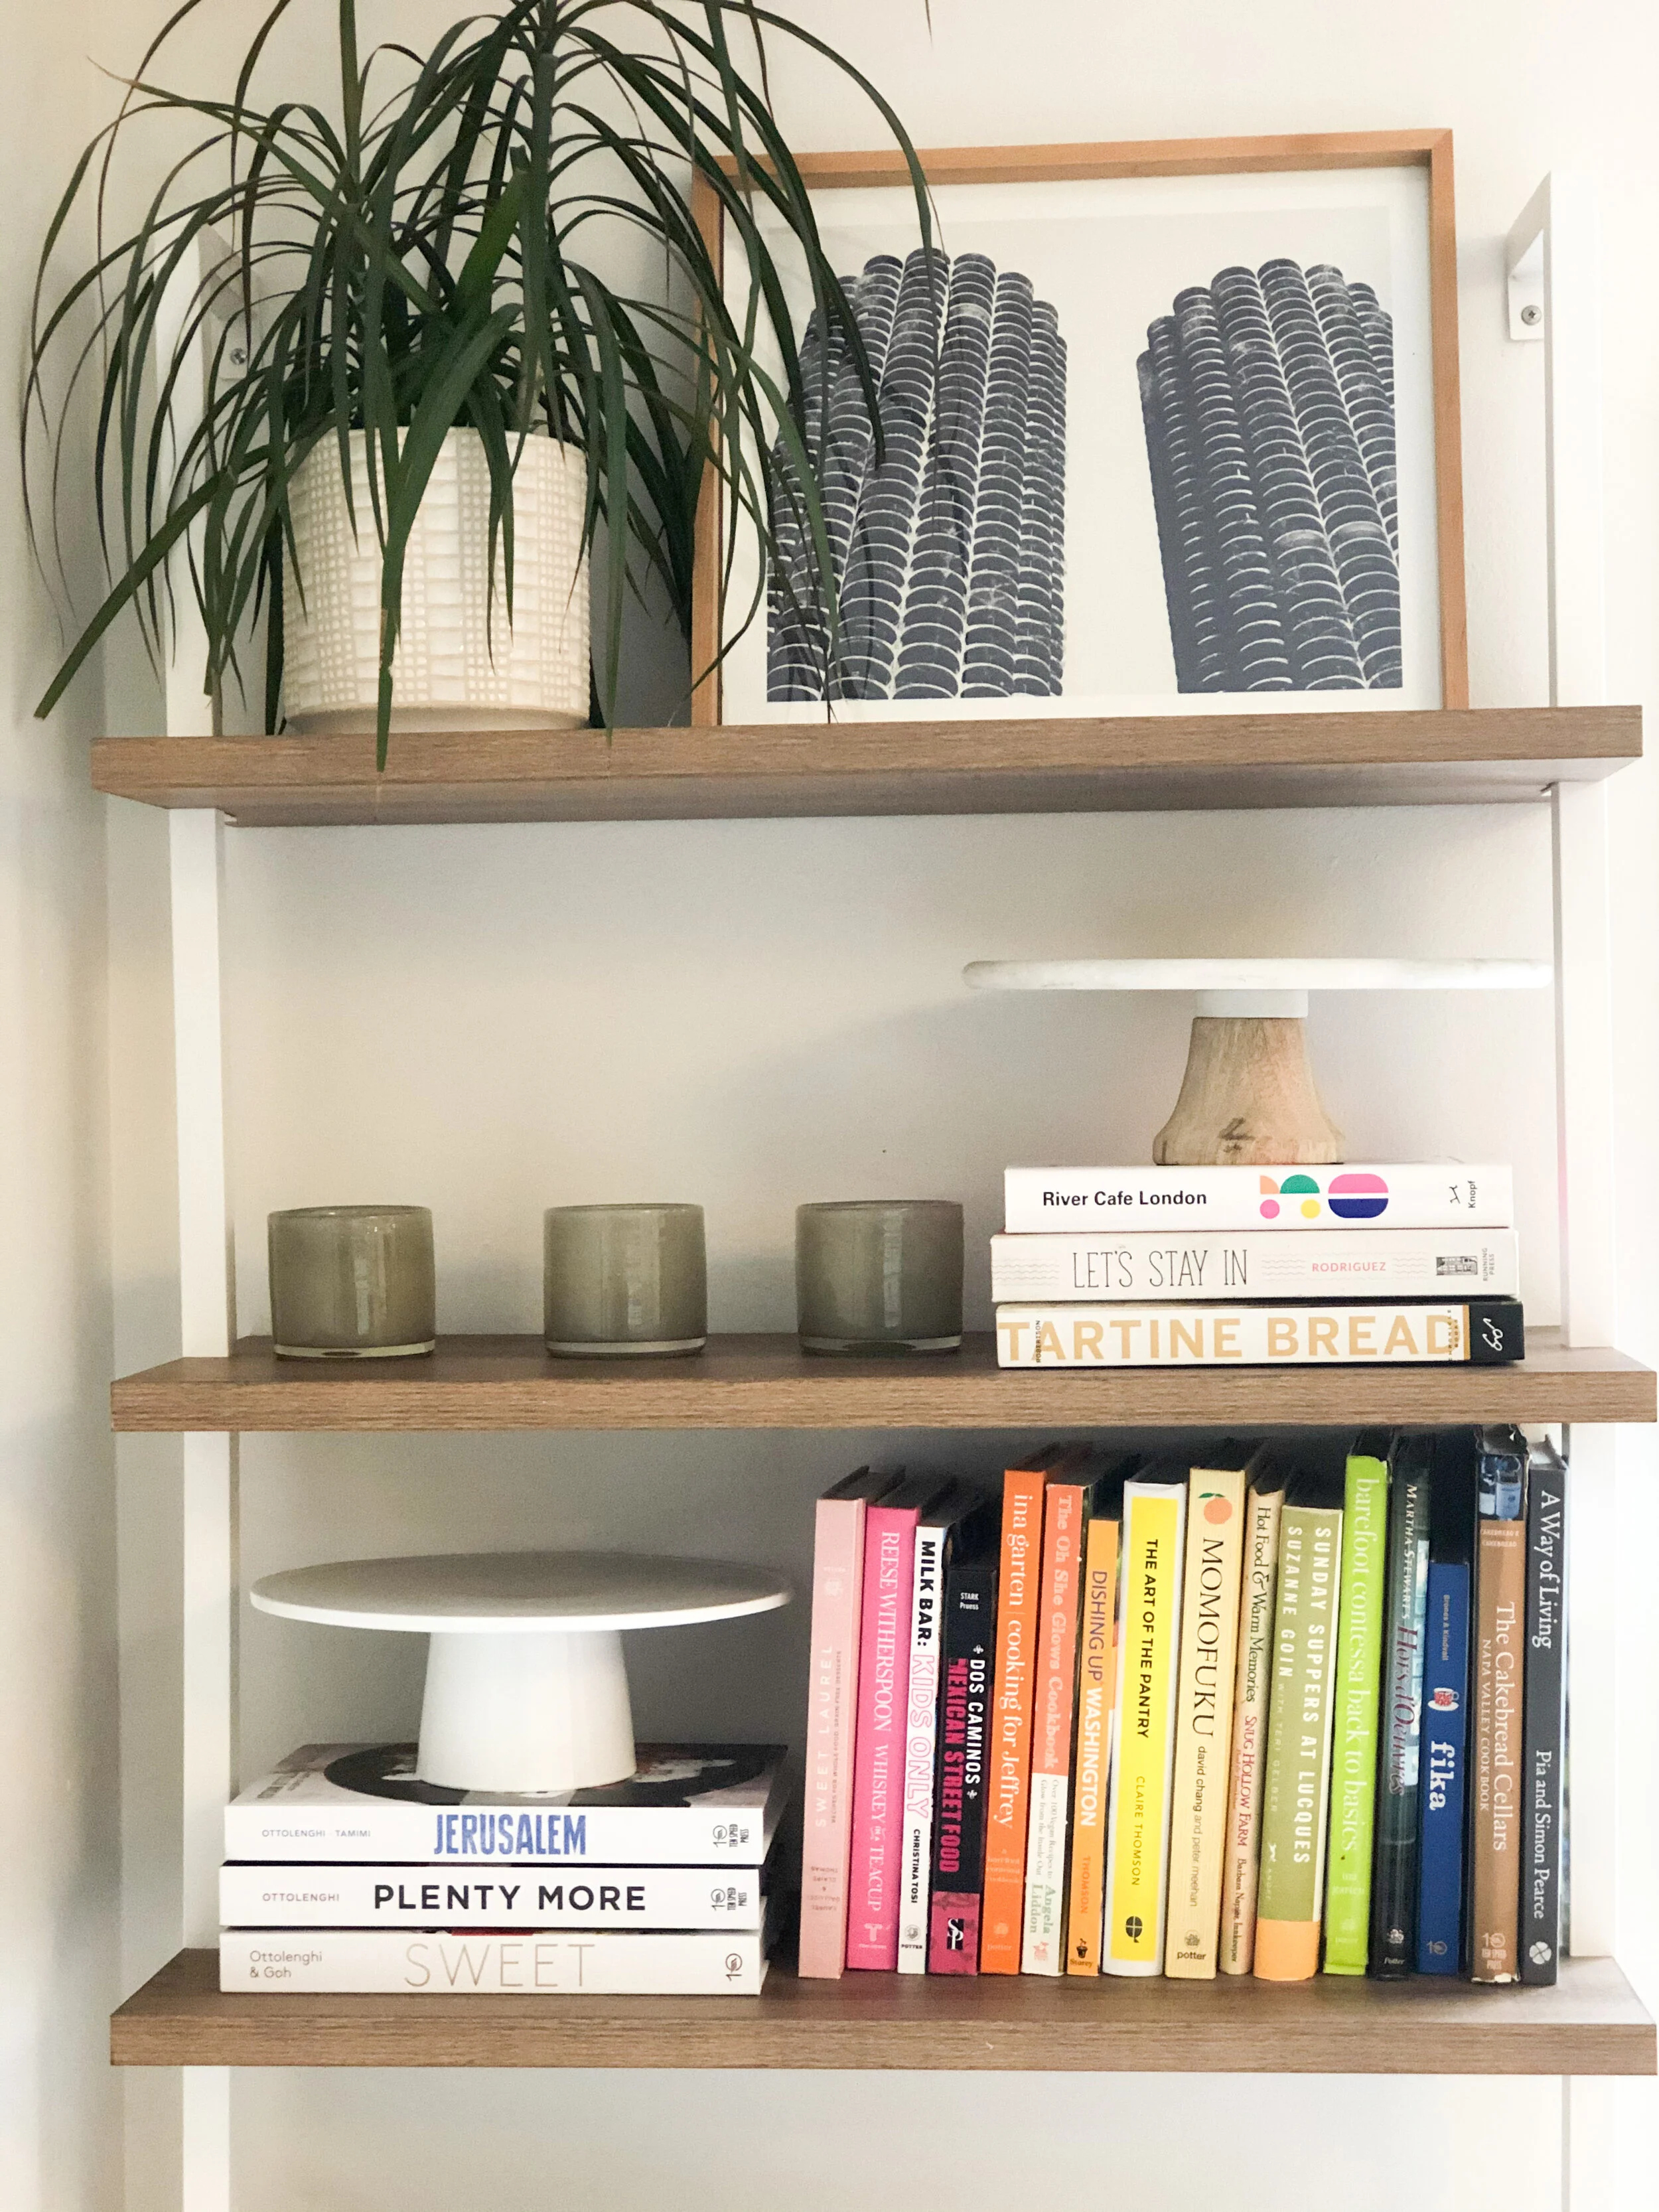
The other objective I had was incorporating my collection of cookbooks, which had previously been stashed behind cabinet doors and were not within easy reach. With my game plan in place, I set about arranging the books and mixing in a few decorative items.

6 Steps to Styling a Family Bookshelf
Start with your anchors. In this case, the books are the main event, so I kicked off with them. My kids are still young, so their books had to be within reach. This meant the bottom two shelves arranged in rainbow order. My cookbooks could be a little higher up, and they received the rainbow treatment as well.
Practicality vs. Style. Could I have styled my kids’ books with objects or some flat and some vertical? Sure, but they won’t stay that way so what’s the point?! I brought my style game to eye level and arranged my cookbooks both stacked and inline.
Stack well. I chose to employ two different techniques with my stacking game, which serve to highlight specific books. The first was a monochromatic technique, which was an easy choice with a majority of my cookbooks having a white spine. The second was stacking by author. I’m a huge fan of Yotam Ottolenghi, so he received pride of place with his own stack.
Accesorize the stack. To break up the vertical and horizontal orientation of your books, the addition of a decorative item (vase, candle holder, etc) works beautifully. In the case of the cookbooks, I added two cake stands as a nod to the culinary nature of the books. On the stack of childrens’ books that were too tall to line up vertically, I added the sweet little wood cash register. It’s lightweight enough to be moved by the kids, but designer enough to earn its place in a visible spot.
Fill in the blanks. There were a couple of spaces that needed filling in, and given we had height on one side already, I selected shorter pieces (low basket and low candle holders) to balance out the shelf.
Top it off. Having something green on your shelves brings life to the whole look, and I like how by using this plant at the top of the shelf I am able to draw the eye up creating the illusion of taller ceilings (mine are less than 8 feet!) Placing the framed photo next to it reinforces this little trick.
When you organize your books, are you team rainbow, team author or team title?
With love,
Steph